
How to ask a question
Most people don’t know how to ask a question effectively, don’t be one of them. An important part of learning is figuring out how to ask for help, and how to do it properly.

If you’re serious about game development, you’ll save yourself a lot of time and headaches by learning about a source control.
In this lesson we’ll learn to make a git repo with github, commit changes, and push those changes to a remote server. It’s time to GIT GUD! (get it? Yeah ok, I’ll stop)
Source control is a way to backup and organize your code so that if anything happens to
your computer you’ll always have a backup copy and won’t lose hours, or worse… months… of
work. Sure you don’t need to use source control to make games, but I highly suggest you do
and I strongly encourage anyone interested in game dev to make it a regular part of your
development process.
In this tutorial, we'll be using git to store and backup our files. If you don't want
use git, at the very least use a service like
dropbox to back up your files. However, be warned that in a game development studio
you'll probably be required to use some sort of source control, so it's a good idea to
learn how to use it properly. In this first tutorial, we'll be using the github desktop
client, but in the future we'll also learn to use git with your computer's command line.
Before we can start our lesson you'll need to open an account with a company that allows you to create a git depot. Both github and bitbucket allow you to have free git repos. On github these repos will be public (everyone can see your code) while bitbucket allows you to make public and private repos. For this lesson, we'll focus on github, but most of the things that we'll do in this tutorial should be transferable so choose the option that works for you.Sign up for a free github account here or Sign up for a free bitbucket account here.
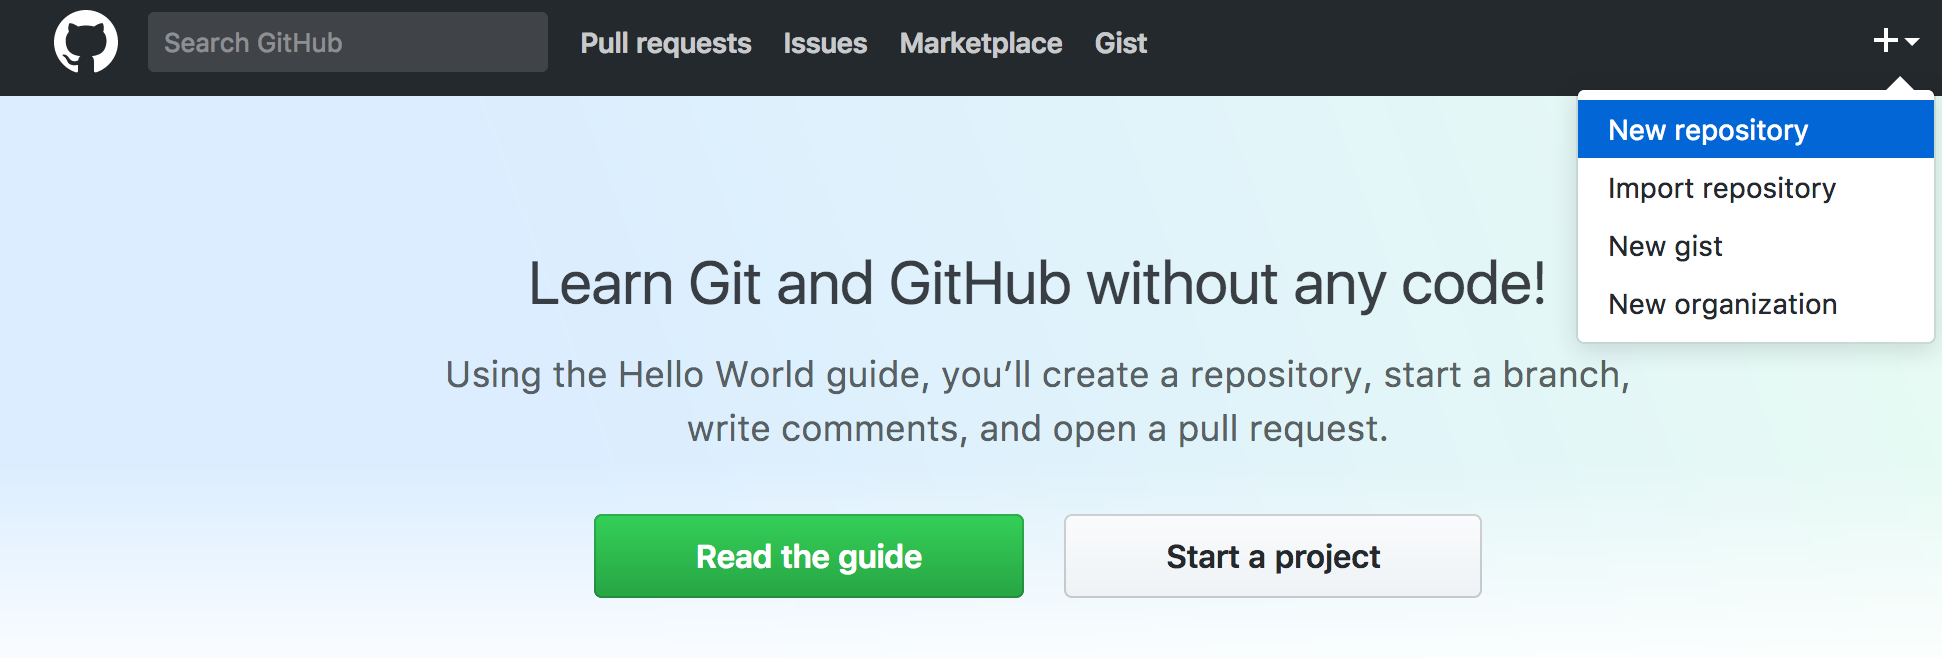
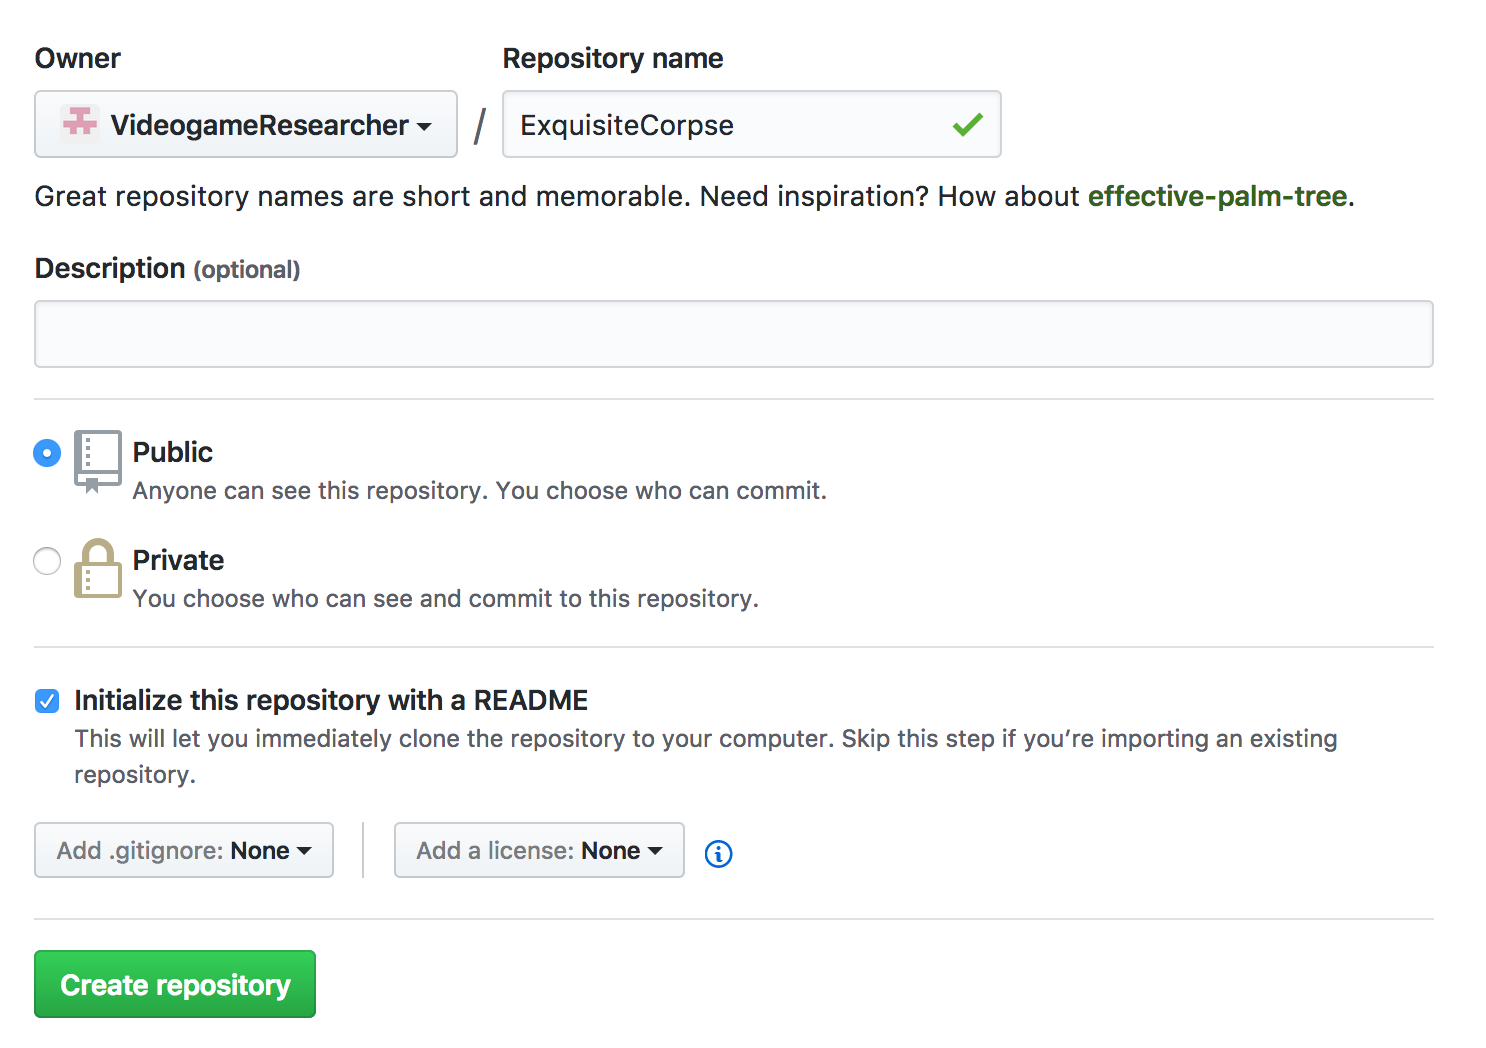
Once you have an account, make a new repository (repo) by logging into your github account and clicking on the "+" menu. We'll use this repo to play a version of the game Exquisite Corpse in another post, so select "new repository" and name your repository "ExquisiteCorpse". Finally, click "Initialize this repository with a README".
Now that you created your new repo, it's time to add something to it. We'll be creating
and adding the files "story.txt" and "nextLine.text." To do this first
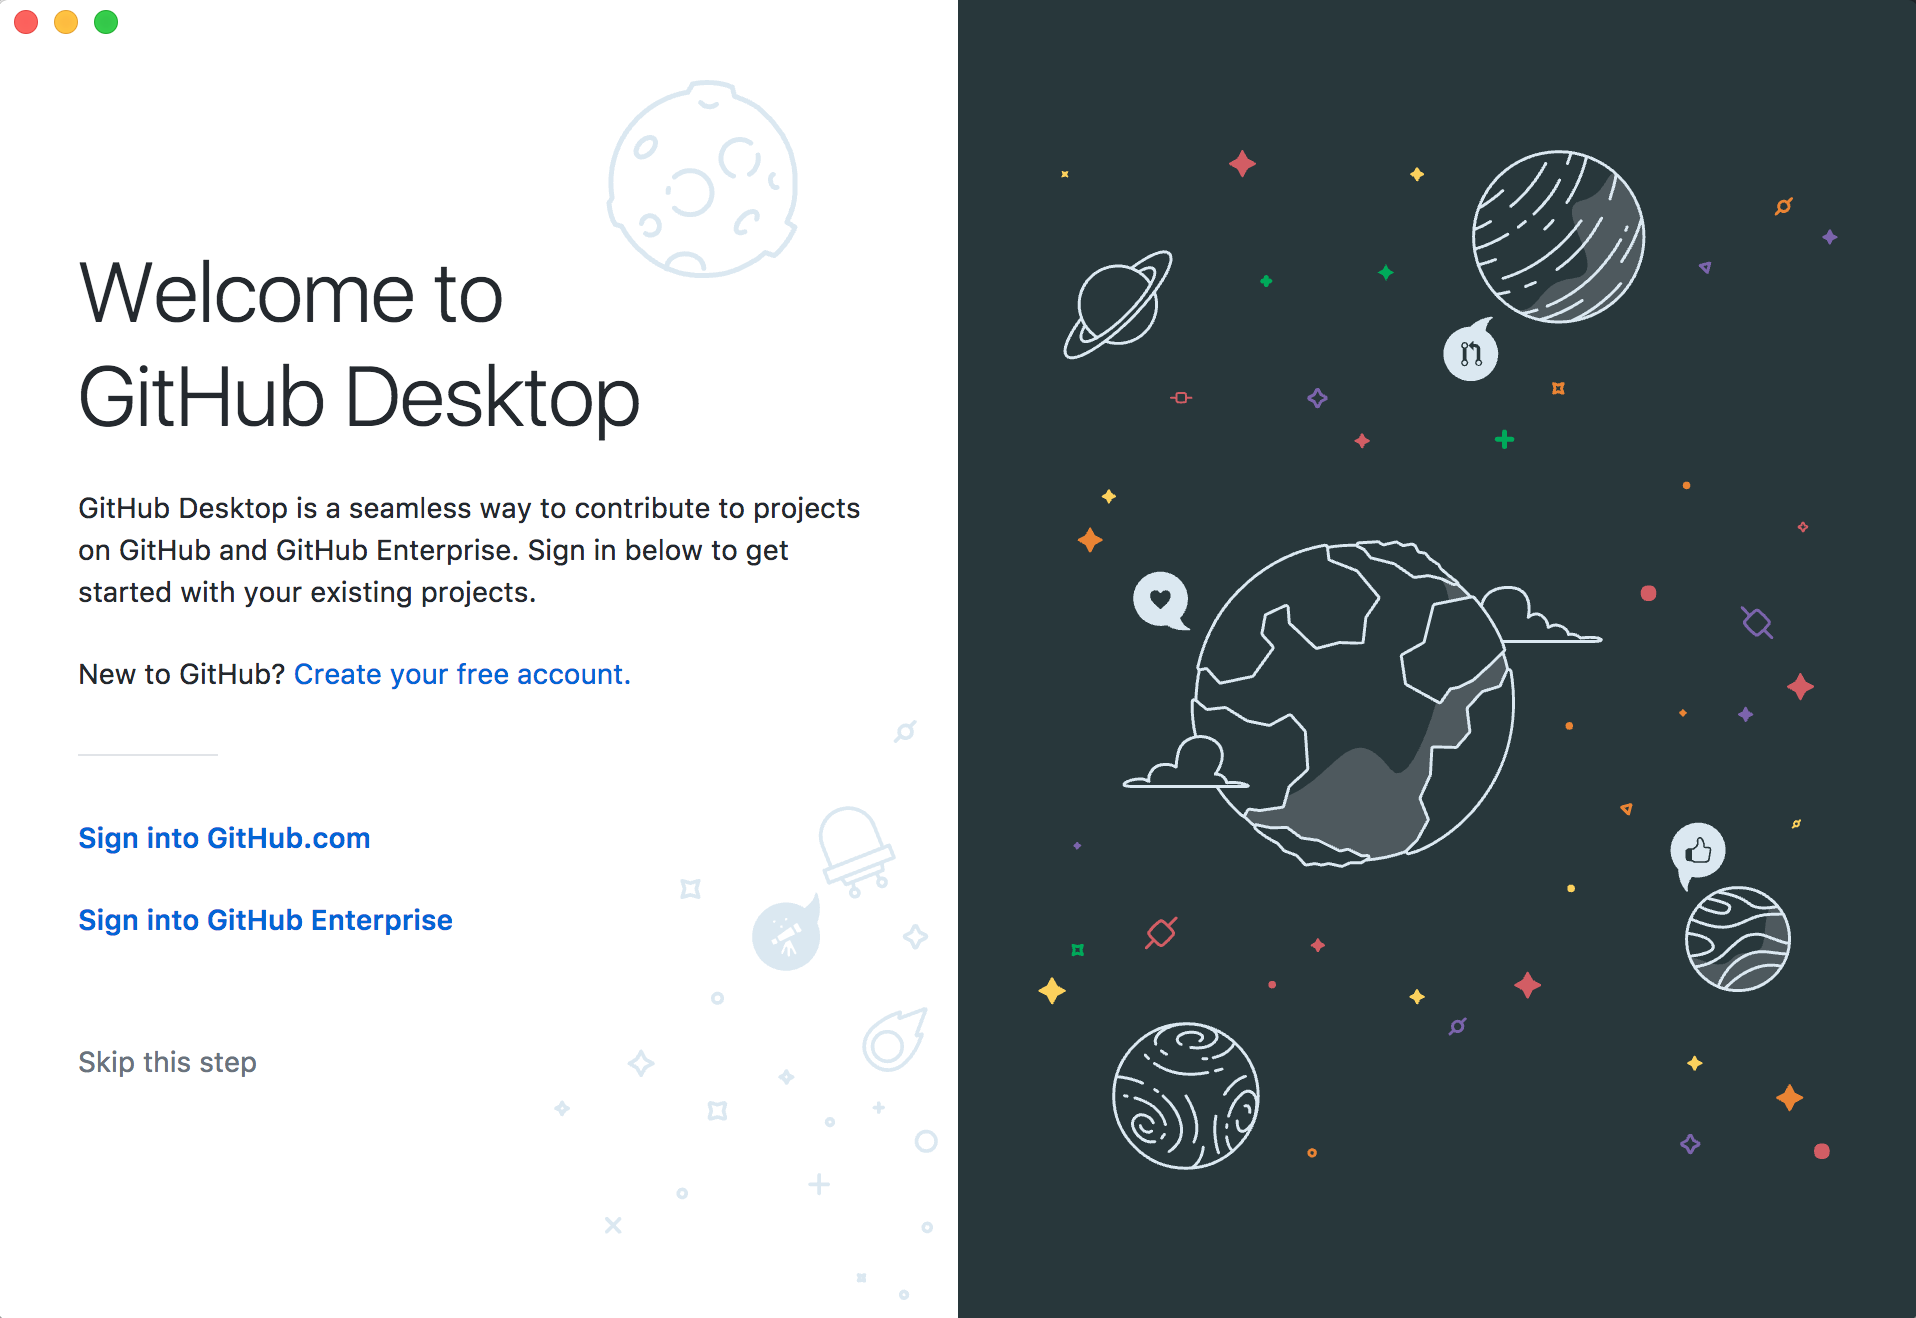
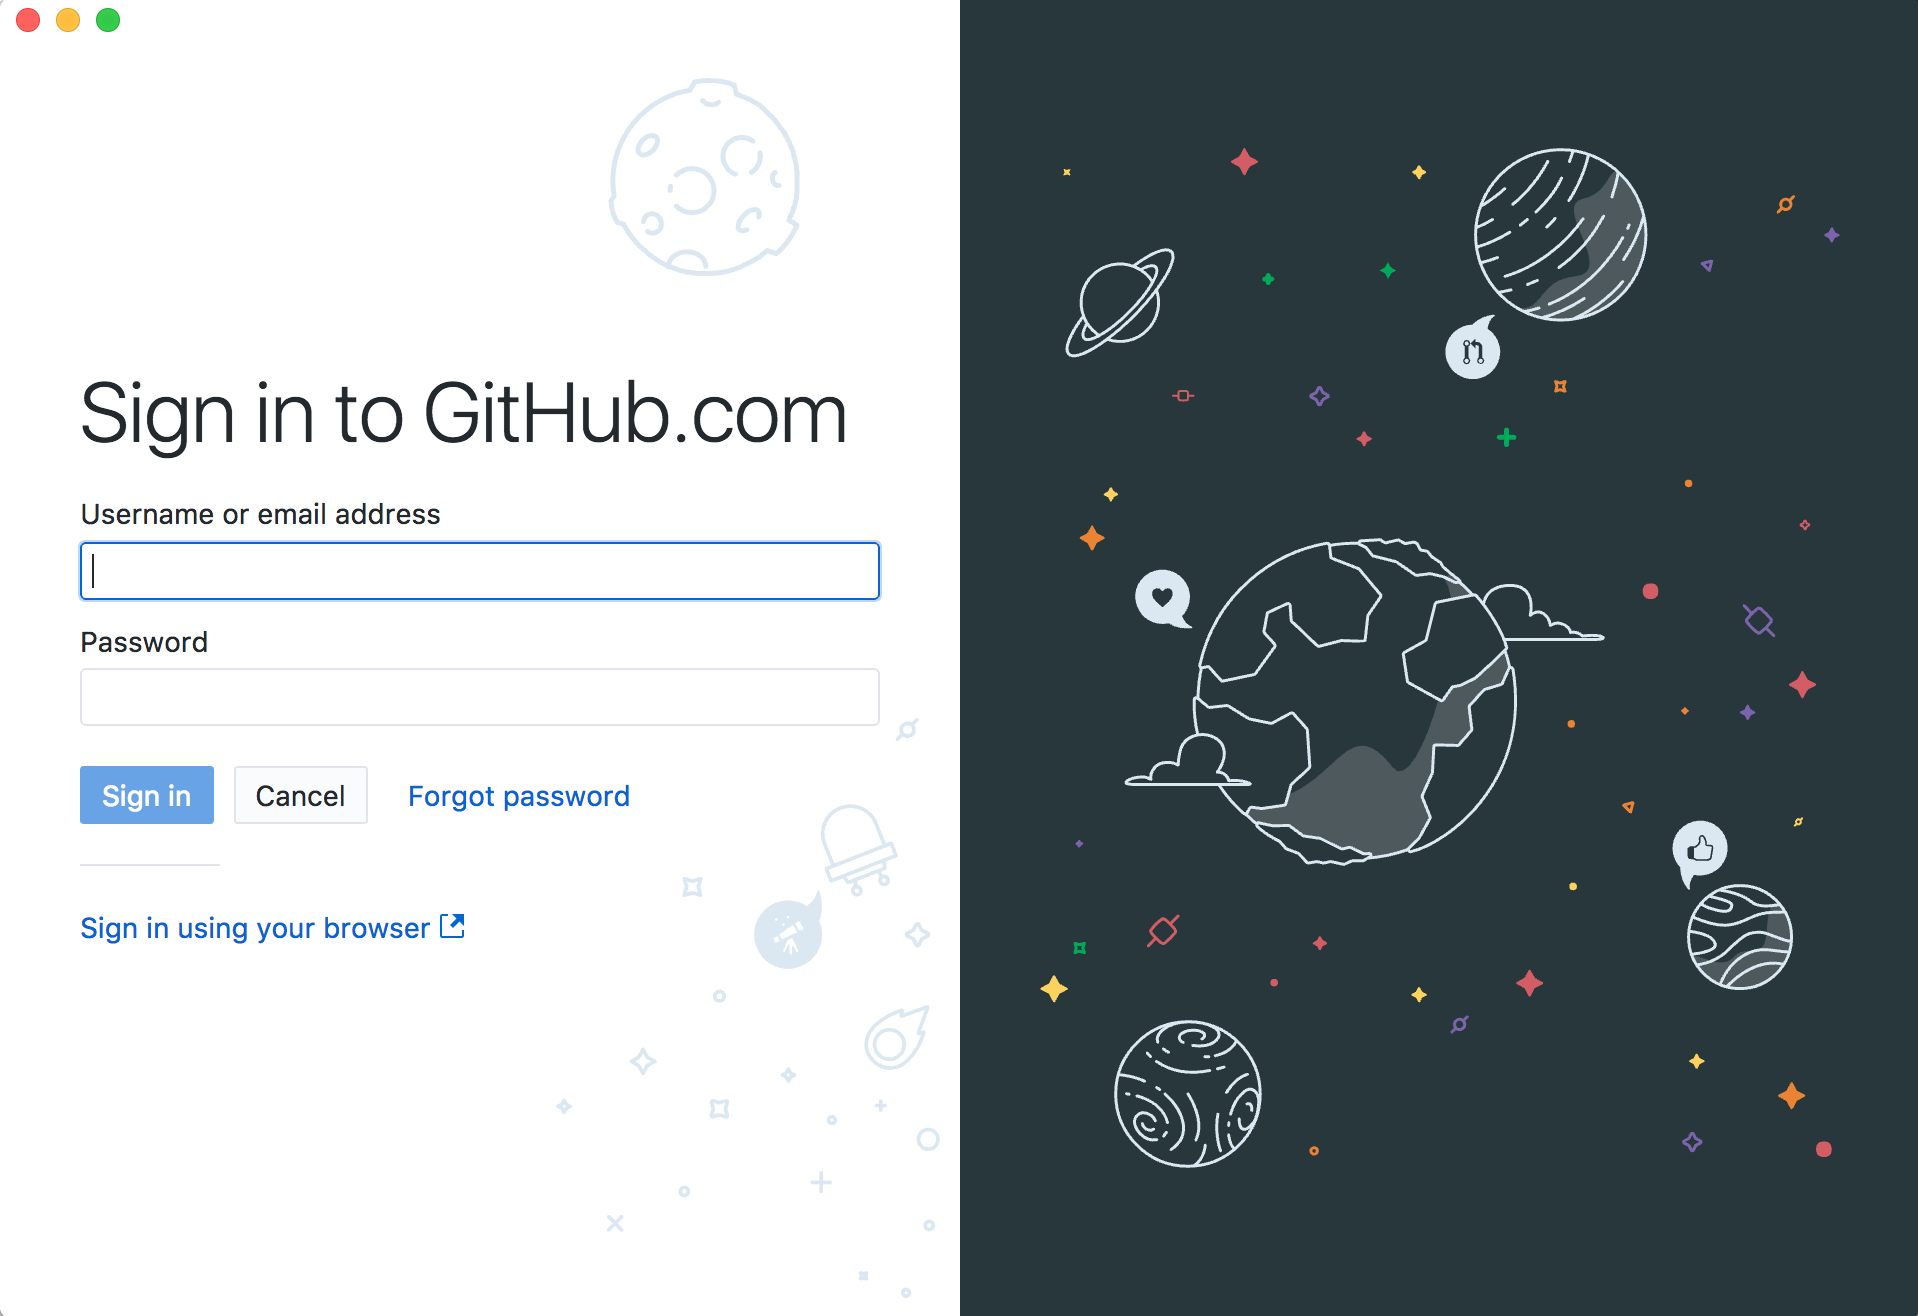
download the github desktop client.
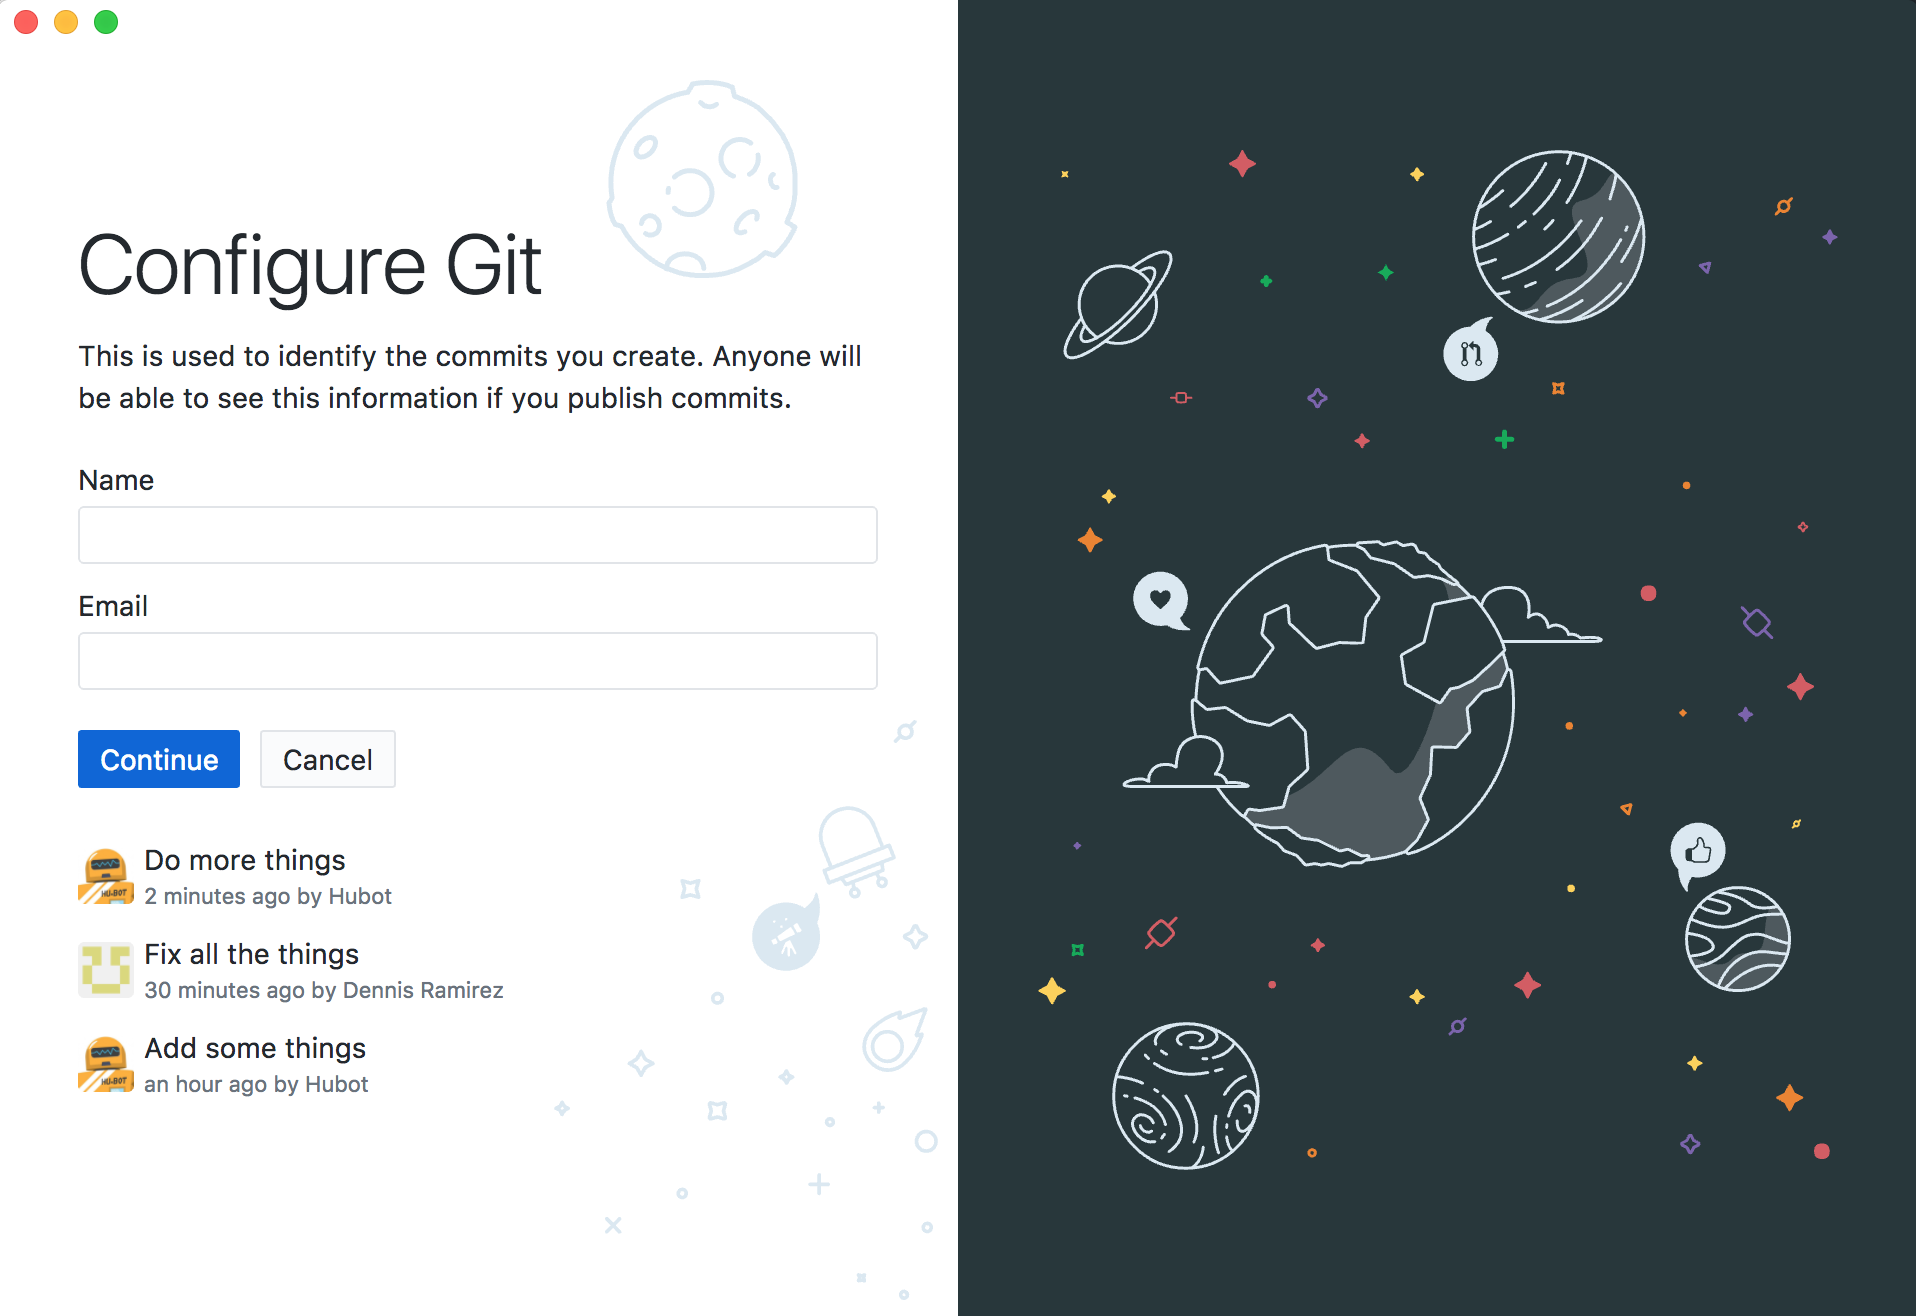
Once you finish downloading the desktop client, sign in, and configure the client. During
this process, you should see the following screens:
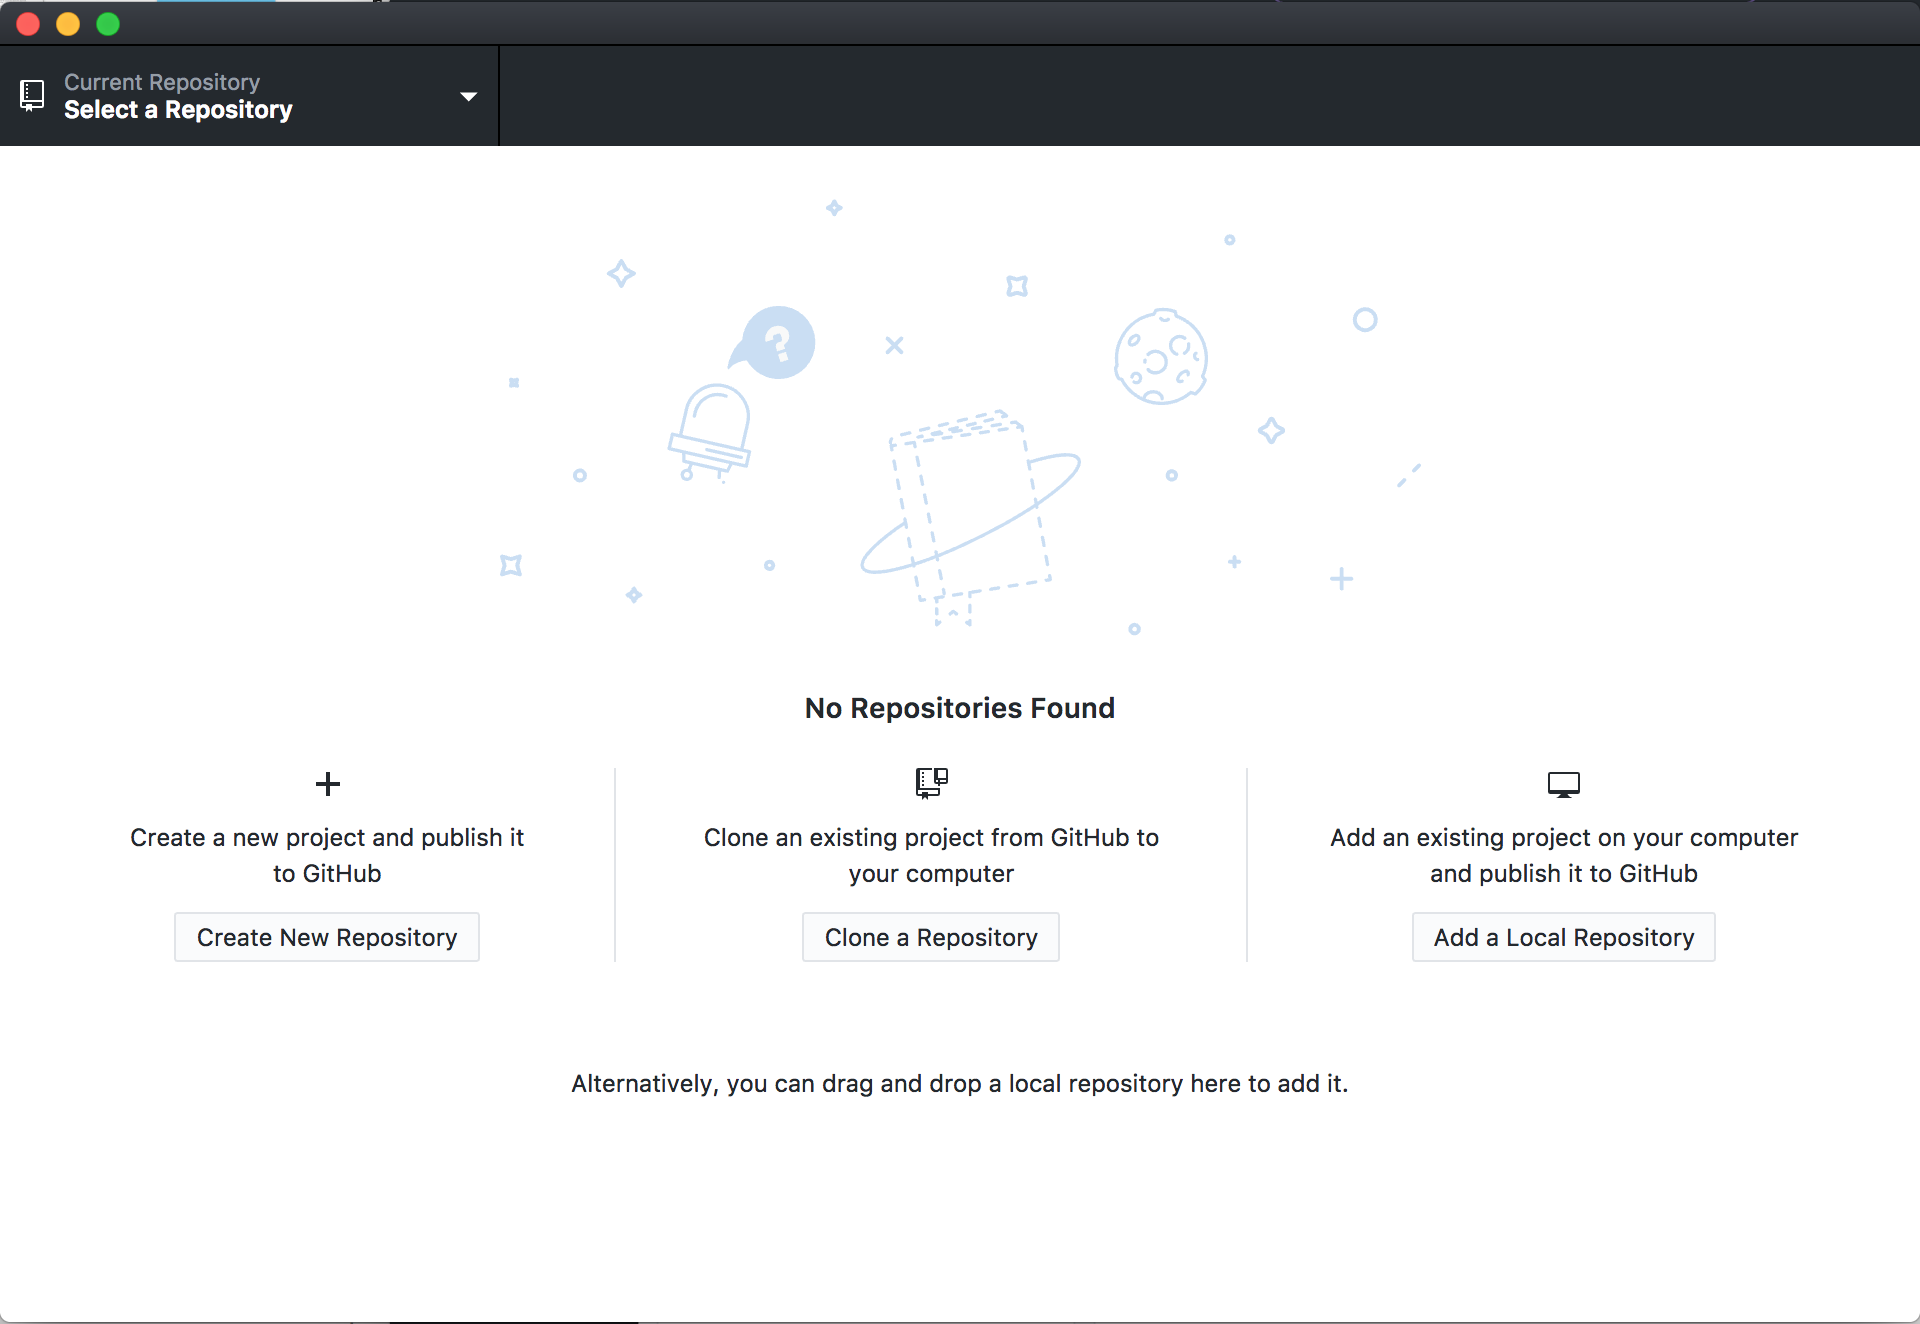
Next we need to get the repo you made on the git hub website onto your computer. We'll do
this by cloning your repo.
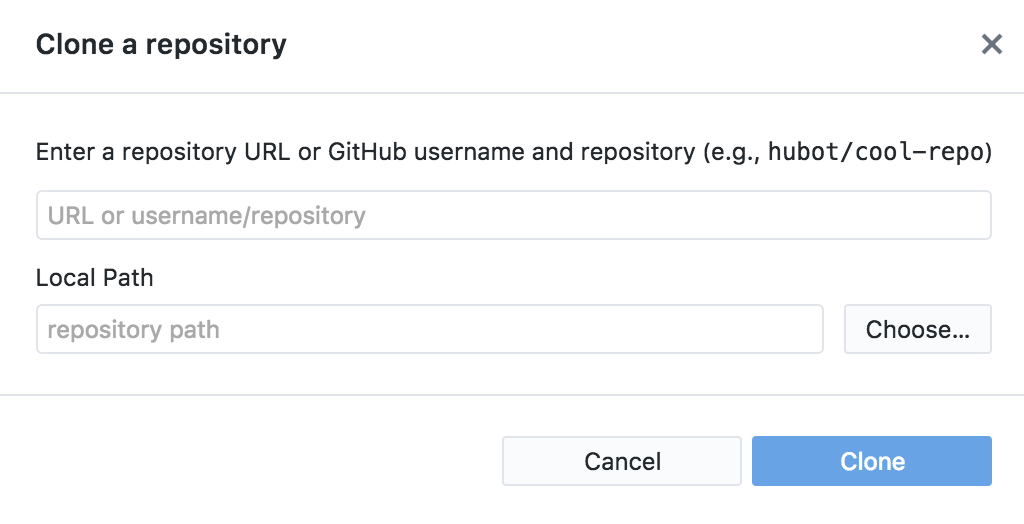
With the git desktop client open got to File->Clone Repository. You should then see a pop up
window asking you for the repo Url or github username and repository. You'll also be asked
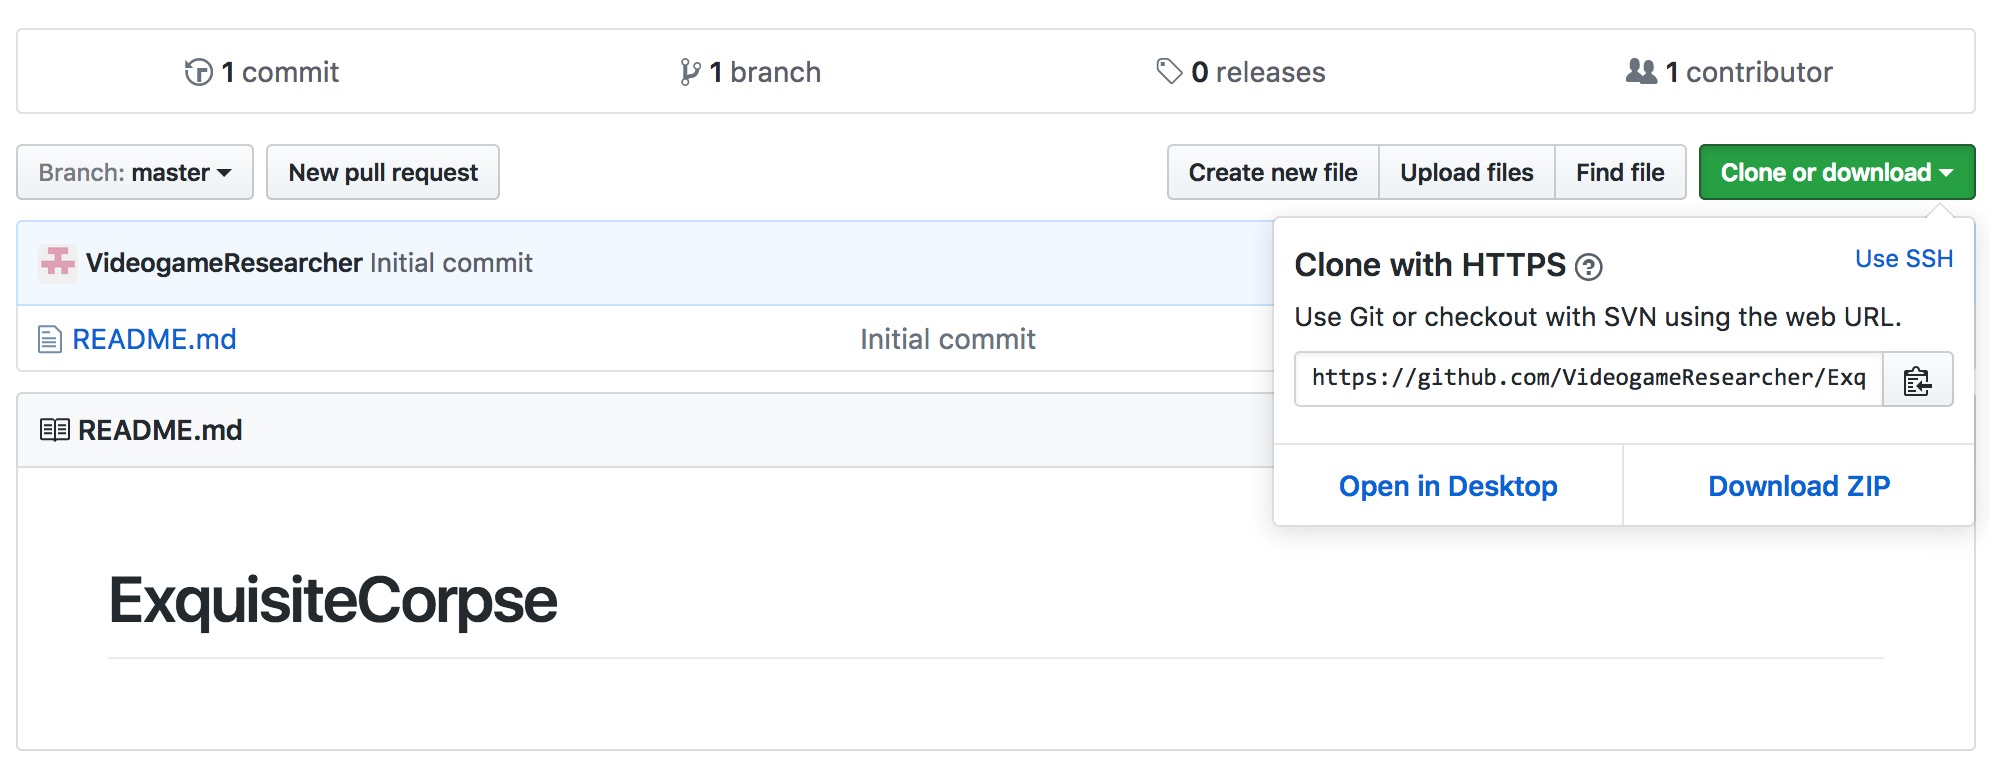
for your your Local Path. For the repo Url, go back to your github repo page and click
on the Clone or download button and copy the Url.
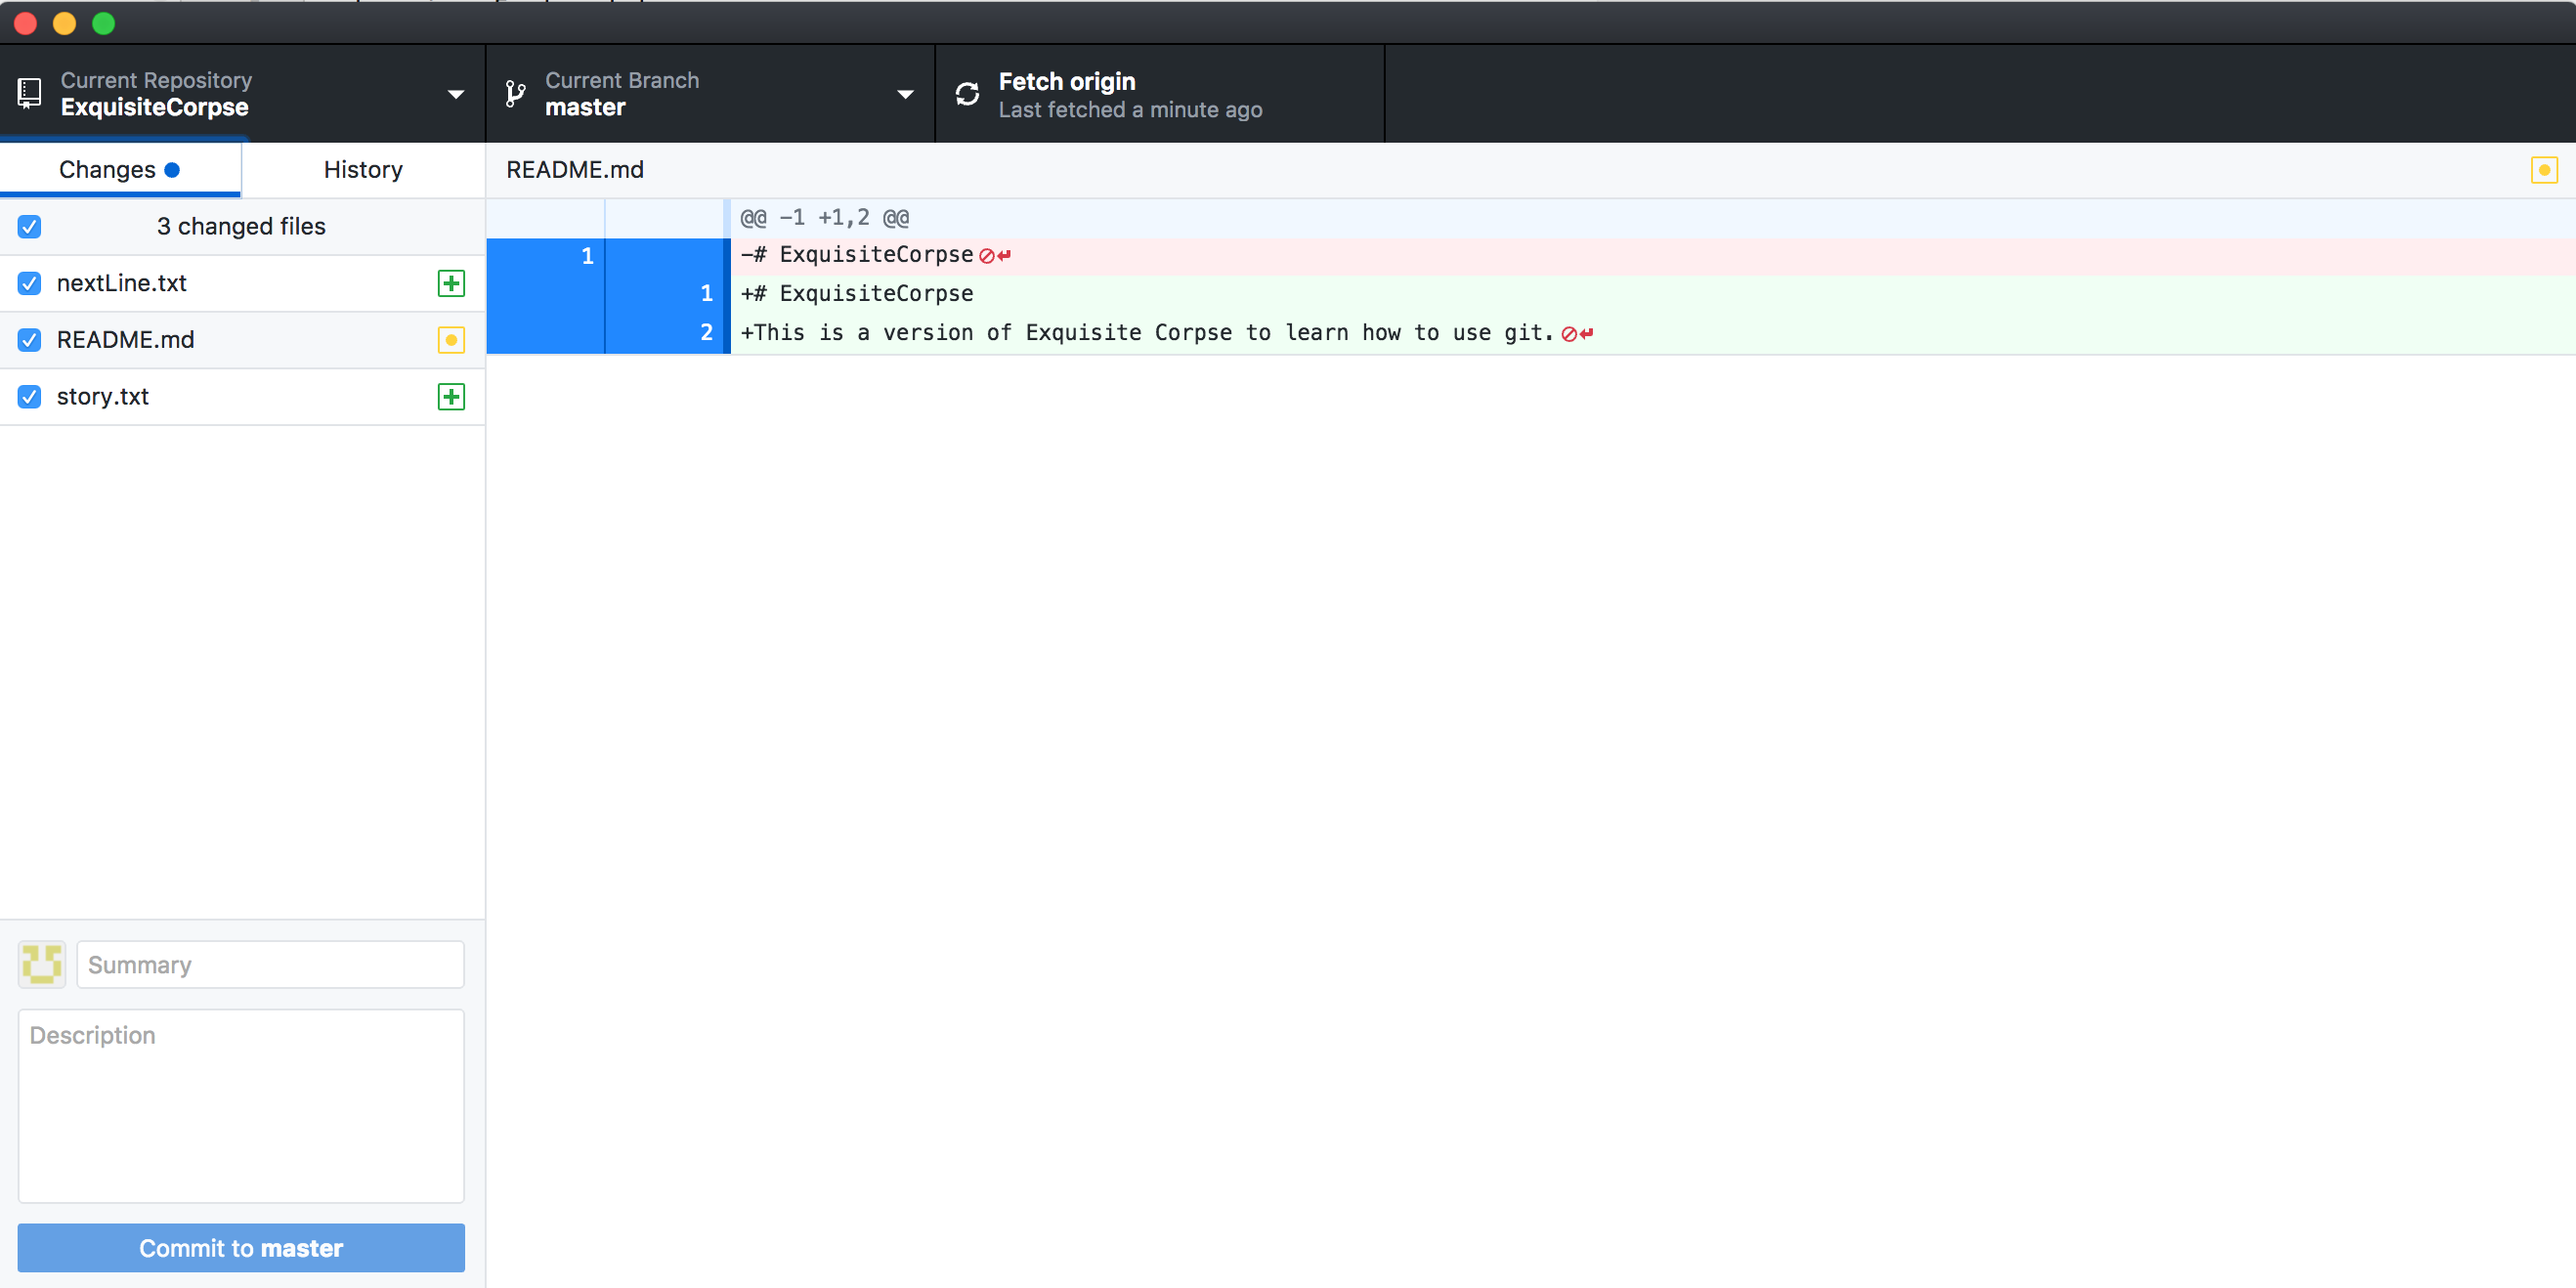
When you open README.md for the first time there should only be one line of text "# ExquisiteCorpse".
Let's add a line to the file that describes this repo. Something along the lines of "This
is a version of Exquisite Corpse to learn how to use git."
Next, let's add some files to the repository. Using your plain-text editor, make two new
files called "story.text" and "nextLine.txt" and put them in the same folder as your "README.md"
file.
Finally, go back to the github desktop app. it should look like the following screenshot.
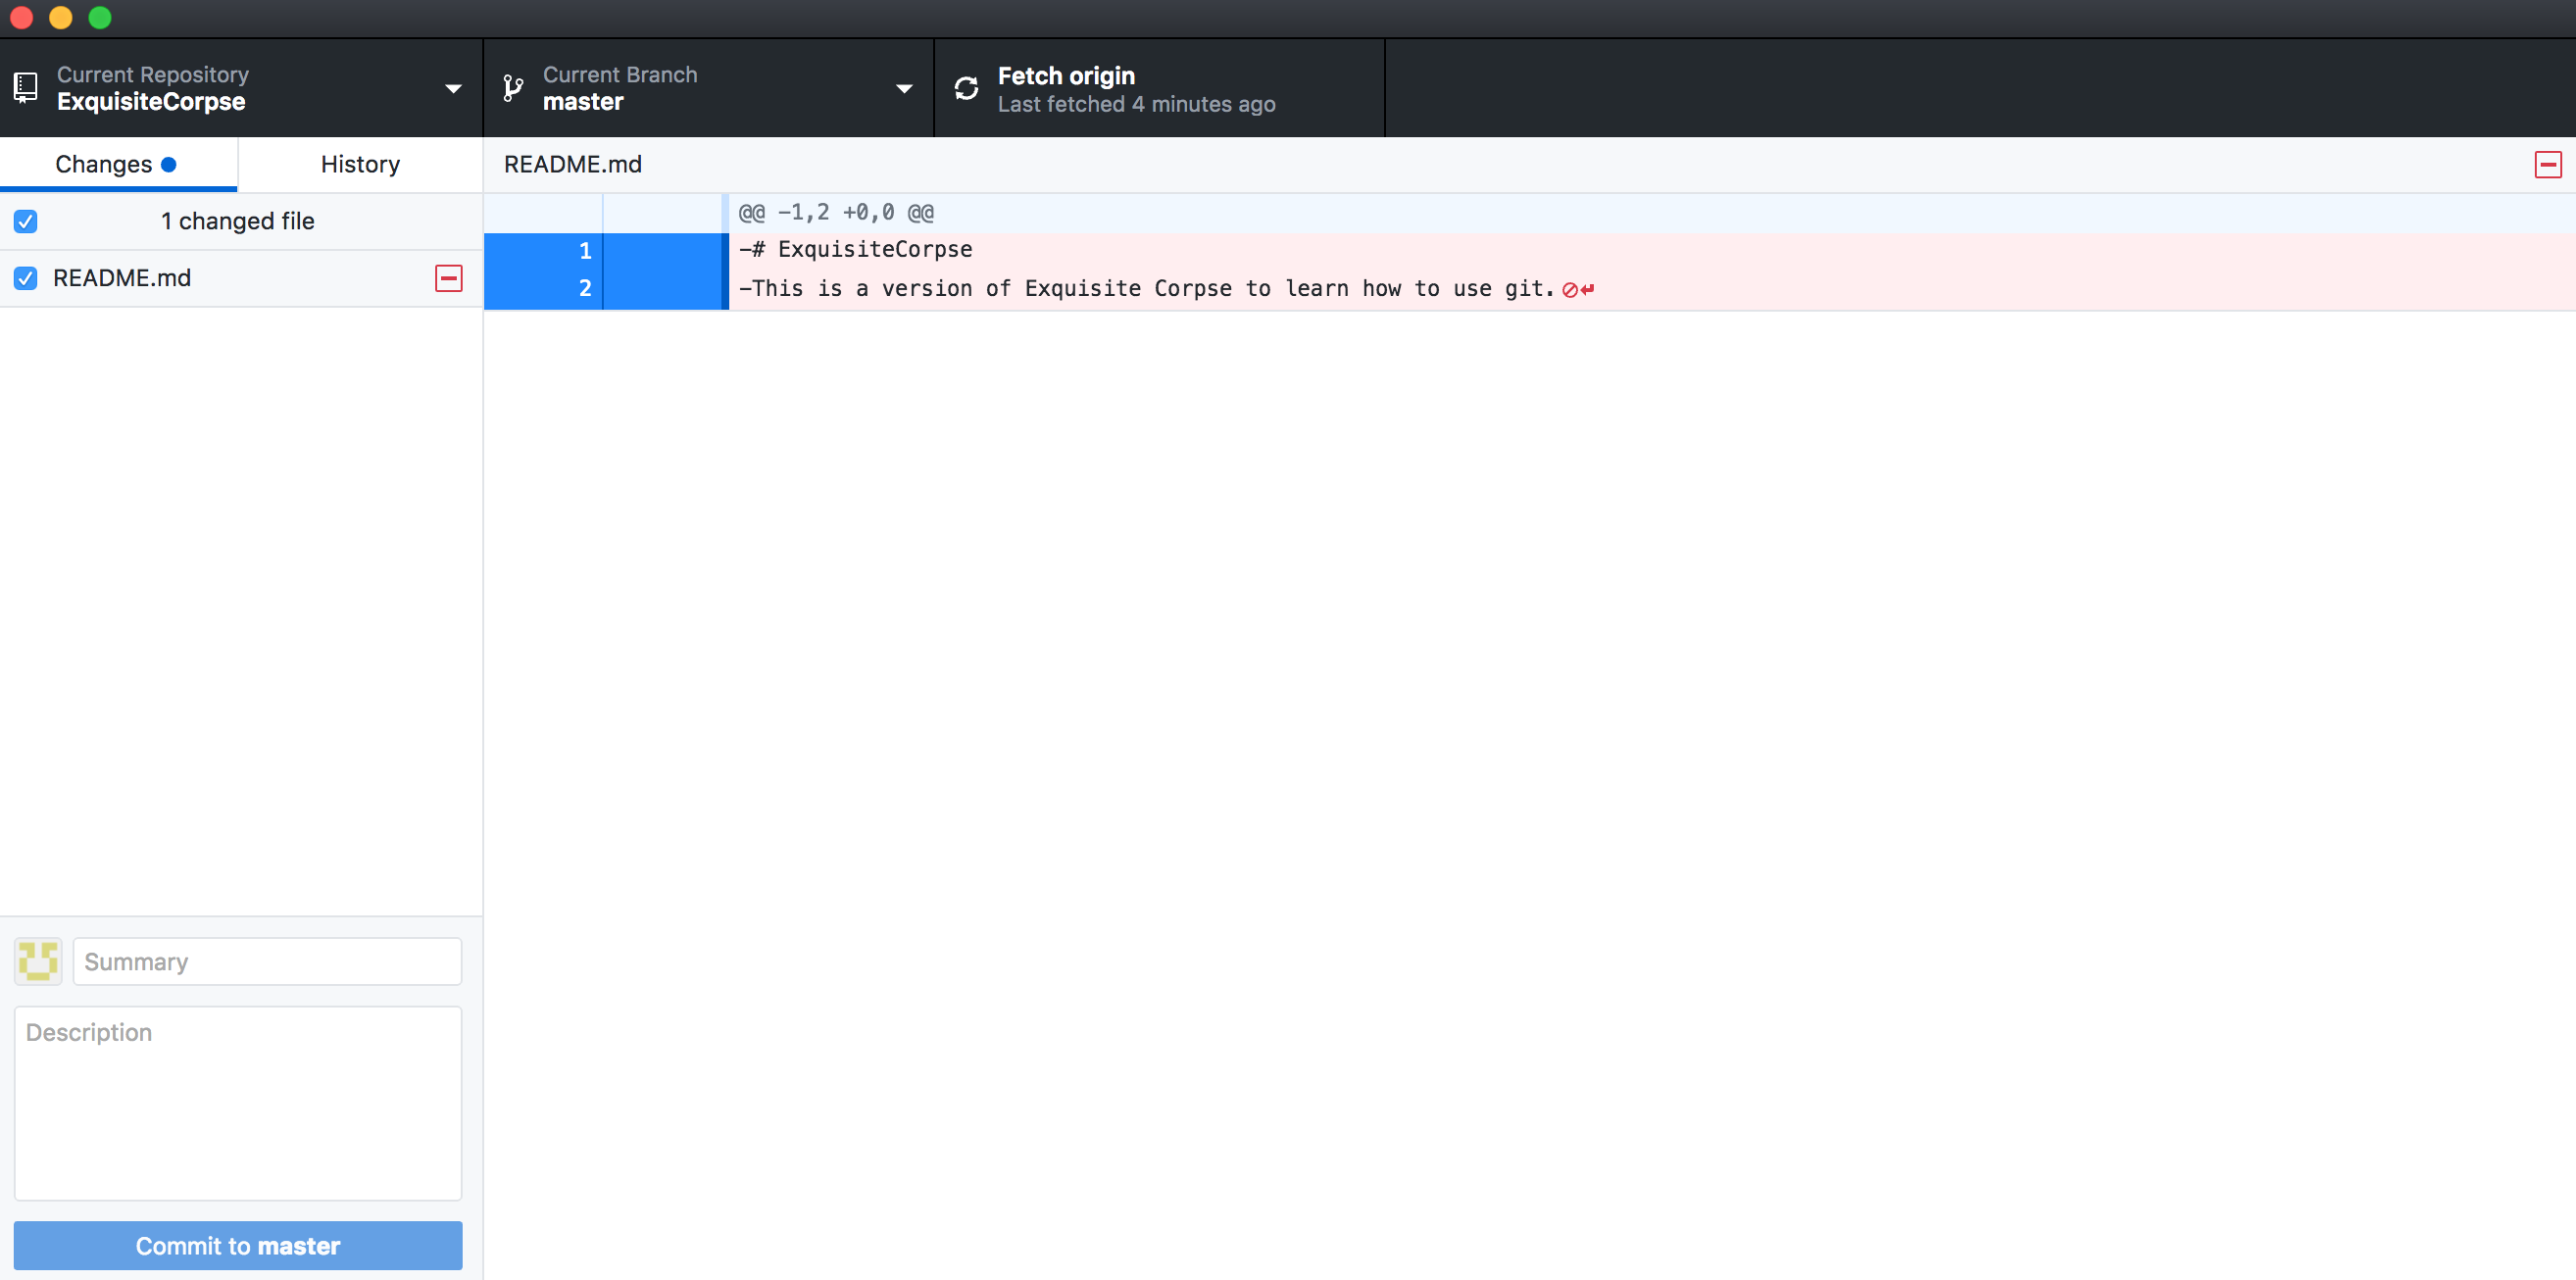
Go back to the folder with the files we created. Select the README.md file and delete it. Next, open your github desktop app and you should see something like this:

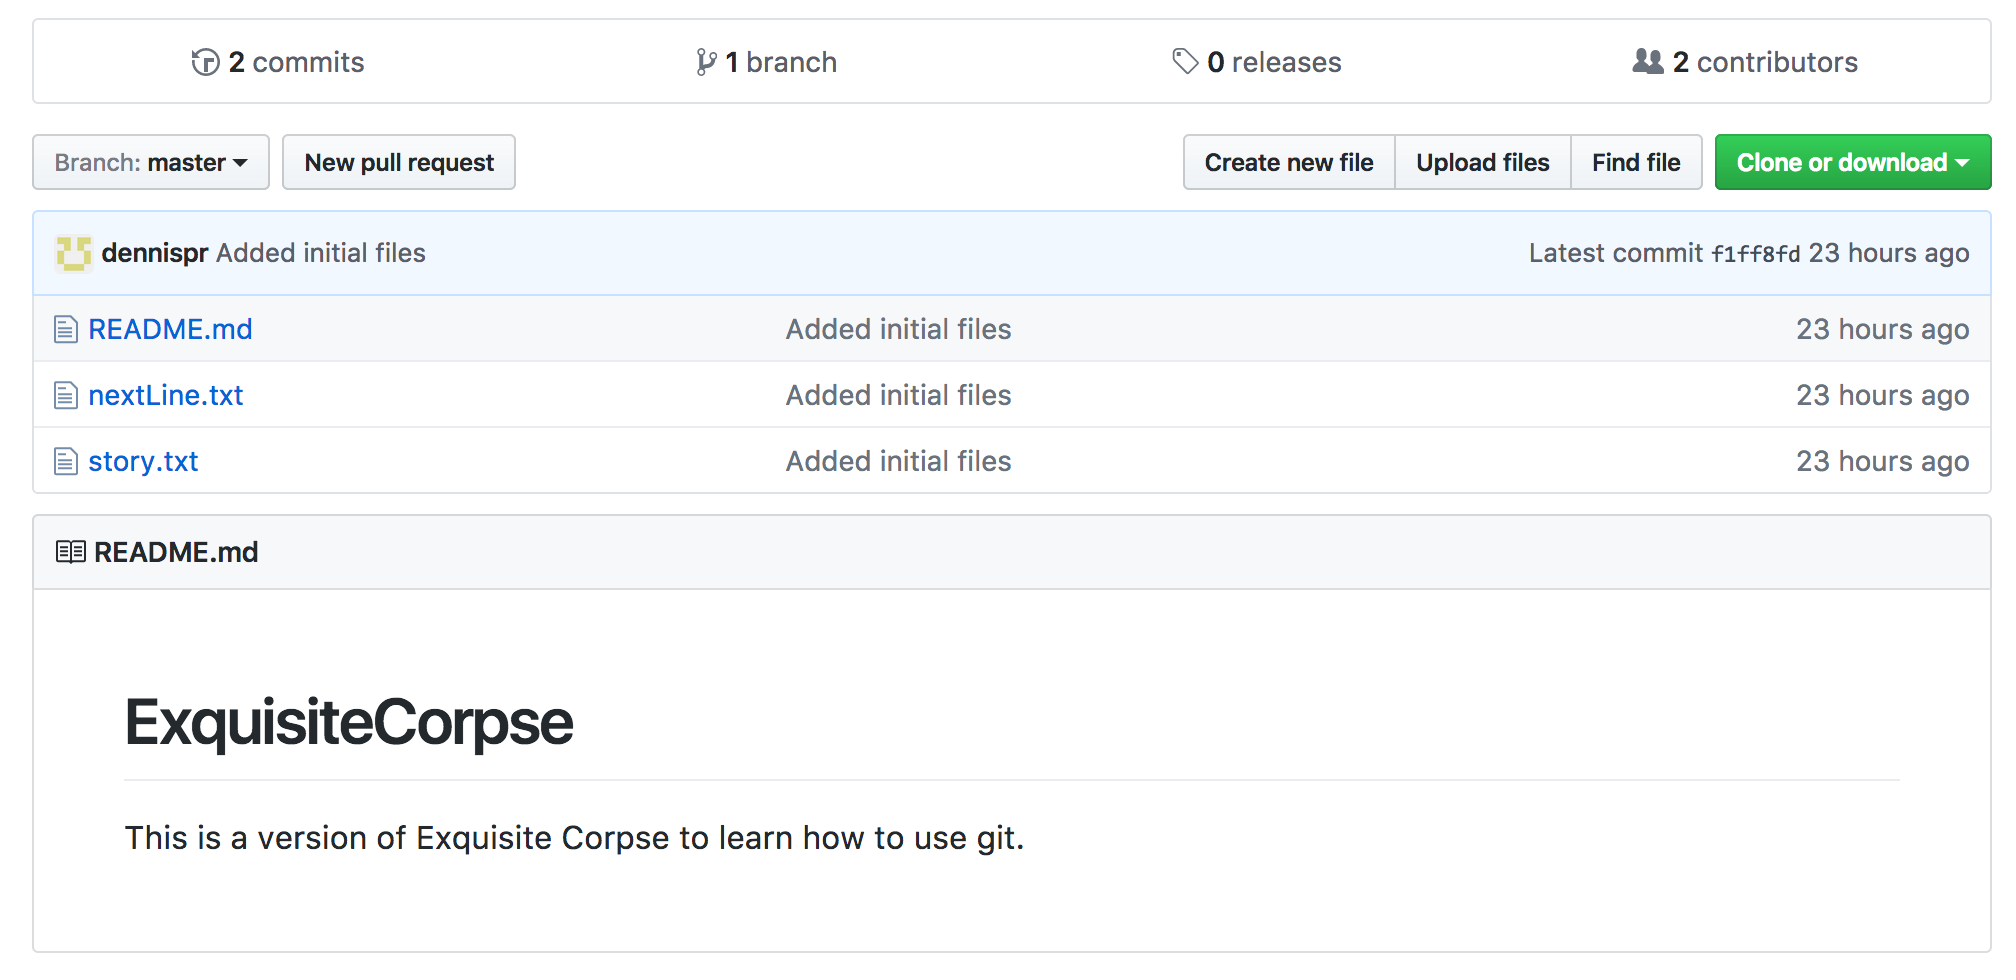
Now that you're tracking your changes locally (on your computer) we'll talk about another powerful feature of source control: backing up your files on a remote server. Go back to the github app and click on the button that says Push Origin. Clicking this button publishes all of the changes to your github account. To see what this means, go back to github.com, log in, and navigate to your ExquisiteCorpse repo. You should now see your files on your account.
Got a git hack you’d like to share? Contact us, connect with us on Facebook, or let us know on Twitter.
Till next time, game on!
Most people don’t know how to ask a question effectively, don’t be one of them. An important part of learning is figuring out how to ask for help, and how to do it properly.

Whether you’re new to critiques, or if you want to strengthen this skill, the method I introduce here will help you give or receive better critiques in any creative endeavor.

There has never been a better time to start designing games. No budget? No experience? No problem. We’ll help you get started.