
Make a Wireframe Prototype
Wireframes are static low fidelity representations of your final product. They indicate things like where buttons should go, what pictures should be displayed, and where text will be shown while making it very clear that the elements shown are not finalized. Think of it this way, a wireframe is to a game what a blueprint is to a building.
It’s important to note that wireframes are not the same as mockups. Mockups are generally a higher fidelity representation of your product with art that is closer to production quality. While wireframes use low fidelity drawings that are meant to be replaced, the goal of a mockup is to simulate a screen of your final product.
Mockups are extremely helpful, but not playable. Having a playable prototype is important. If you want to talk about your idea with others, playtest some mechanics, or pitch the idea to a potential funder you’ll want to produce something tangible that will convey your idea while minimizing confusion. If you don’t have a way to make a full playable prototype by yourself, and a paper prototype doesn’t suit your needs, a wireframe prototype could be very helpful. Making a Wireframe
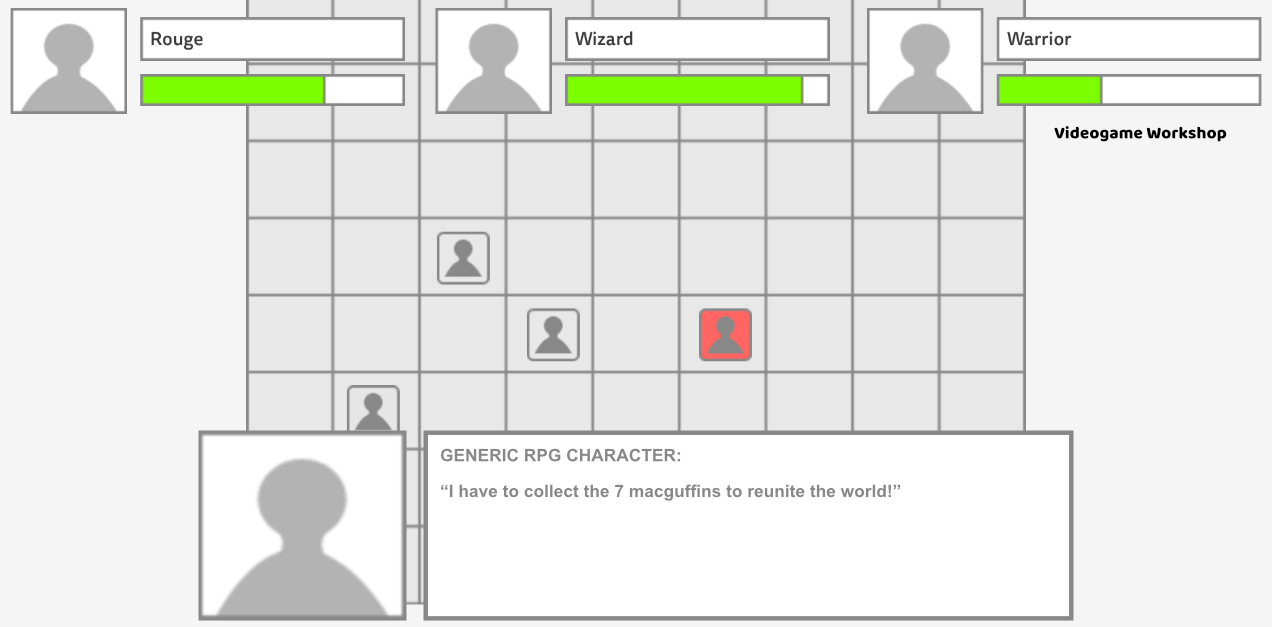
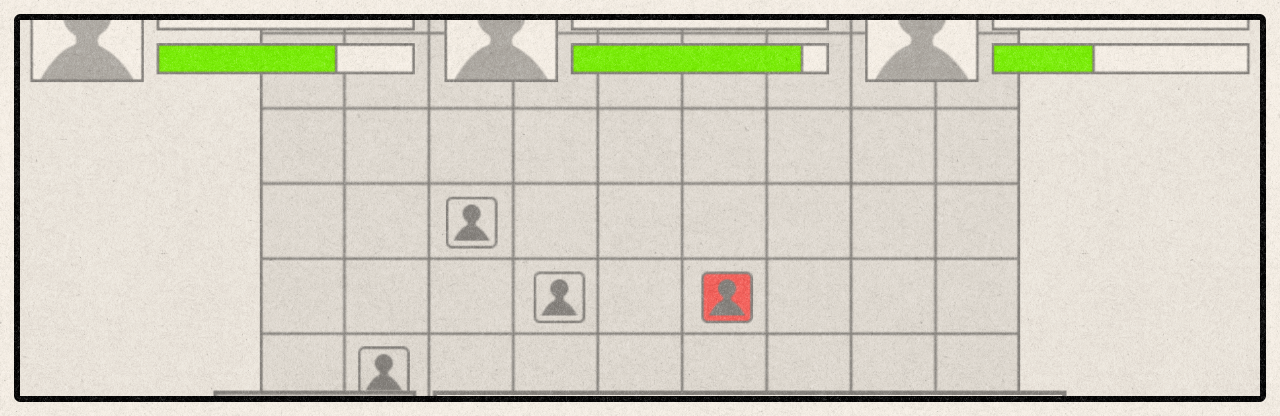
Tactical RPG low fidelity wireframe example
A low fidelity wireframe, like the Tactical RPG example above, is relatively simple to produce, and clearly communicates the game’s structure while leaving the actual implementation flexible. Unlike mockups, these wireframes can be interacted with a bit by having pre-designated areas that can be clicked on that change what you see. Generally, you want the most important parts of your game to have this low-grade intractability so that you can communicate the most important interactions and information presented to the player. In the case of the image above this wireframe might change if you click on another unit, might let you click on some menu, or might let you advance the conversation. This is exactly what we want from a wireframe. This wireframe tells us several things about the game:
- We know that the proposed game has multiple units (Rouge, Wizard, and Warrior)
- We know these units will at the very least have a character portrait and a health bar (or other status indicator)
- We know that the game will have a conversation system, and we know that the game will most likely be grid-based
Generally, you would want to produce a wireframe for all the major parts/scenes of your game.
If this Tactical RPG example above was green-lit, we would expect the finished game to swap out the generic art and template with a UI system that complements the desired aesthetic. However, at this point in production (Pitch/Pre-production) it’s unlikely that the art direction has been finalized. It’s also not uncommon for the art style or aesthetic to change during Pre-production, sometimes quite drastically. By keeping our wireframes low-fidelity and abstract, we can continue working on the game’s mechanics even while the game’s aesthetics are still being pinned down.
Once you have your wireframe made, now it’s time to make it playable.
Making a Wireframe Prototype
You can turn your wireframes into a working prototype by linking mockups together in a way that your users can interact with. To do this you can use a tool that specializes in producing wireframe prototypes like Figma, or MockFlow. Or, you can use generic programs like Google Slides, or PowerPoint. In fact, using a simple online tool has many advantages:
- They can be shared online, via email, Google Drive, etc.
- Clients and playtesters will generally be familiar with a program like Google slides or Powerpoint.
- Clients and playtesters won’t have to install anything new.
- Clients and playtesters can click through at their own pace to get a better idea of the proposed game.
- They can be updated easily and quickly.
- Most importantly, a wireframe prototype can serve as a living game design document that can be shared with your team.
Once you’ve decided what tool you want to use, translate your core interactions and mechanics into slides/boards/pages. Make sure to include every button, pop-up, and menu you think your player will need to see. If you don’t know where to put them use your best guess, after all it can always be revised. Then, add the logic for how to get between each part. For example, in Google Slides you can right click on a “button”, select “Link”, and then choose a slide. When the player clicks on that “button” they will jump to the slide you selected.
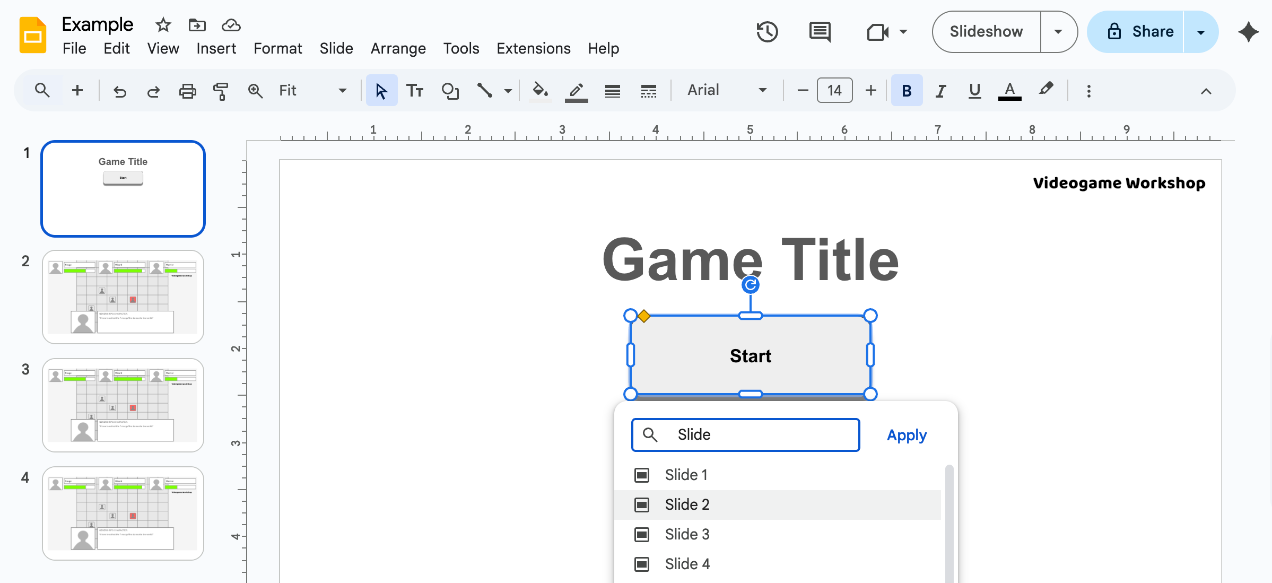
Example of how to link slides in Google Slides
You might be surprised that as you work on creating your wireframe you’ll find gaps in your core loop. A player will be in a sub-menu and have no way to get back to the main gameplay. How do I return to the overworld after a battle is done? Does the player get a map? Time to add an X button!
Wireframe prototypes are fast, flexible, and can serve as a living game design doc. For the time and resources it takes to create them, they are a great way to get your game idea in front of someone quickly.
If you’ve finished making a wireframe prototype and want something something you can make even faster, try making a Paper Prototype The fastest and cheapest option.. If you want something a little more detailed, try Greybox Prototyping.
For more on our prototyping series check out:
Consider becoming a patron for exclusive content and perks.
Or sign up for our substack